Made a debut not that long yet Fliki is a standing ovation owing to its flair. This makes the most of advanced AI to blossom any projects in your mind.
Things will get iconic and yes, it gets going. And if you feel Fliki is not worth the hype or can’t please you, perhaps, you’ve not touched all it can offer you.
Scroll down with Jobandedu! Every aspect of how to use Fliki will be shown off exhilaratingly – less effective or even sparkling
Table of Contents
How Does Fliki Work?
If you’ve run through Fliki AI Review, it’s likely you know how it works.
Discover the magic of Fliki – where the future meets creativity! Unleashing the power of cutting-edge machine learning and AI technology, Fliki transforms your text inputs into stunning audio and video content.
The sleek Fliki text to video generator and a user-friendly interface allows you to craft content from scratch effortlessly.
But that’s not all – Fliki’s blog-to-video converter takes your words and turns them into visually stunning videos, thanks to its ingenious machine-learning flair.
It “wow” you with images, music, and voice-overs within Fliki’s expansive database, allowing you to edit your videos and touch the optimum style.
Back at the event now with a huge question mark. Source: imgix
Let’s learn how to use Fliki in many aspects!
How To Get Started With Fliki?
Here comes the common steps for Fliki use, read on before going for in-depth directions:
1: Create The Fliki Account
Head to Fliki.ai and sign up for a free account.
Choose between email, Google, or Facebook for a quick registration.
2: Pick The Media Type
Select the type of media content you want to create: video, podcast, or audiobook.
Fliki caters to your diverse media creation needs!
3: Add The Text Content
Paste or type your text directly into Fliki, or let the AI content generator work its magic to create text content for you.
4: Customize Your Elements
Choose your preferred AI voice, explore voice cloning options, select an AI avatar, spice it up with stock footage, set the background music, add subtitles, and incorporate effects to make your media content uniquely yours.
5: Preview and Edit
Use the Fliki video editor and tools to preview and fine-tune your media content. With Fliki’s user-friendly interface, editing becomes a seamless part of the creative process.
6: Share The Masterpiece
Download the content and share it on various platforms or embed it for wider accessibility.
How To Use Fliki For Audio Creation
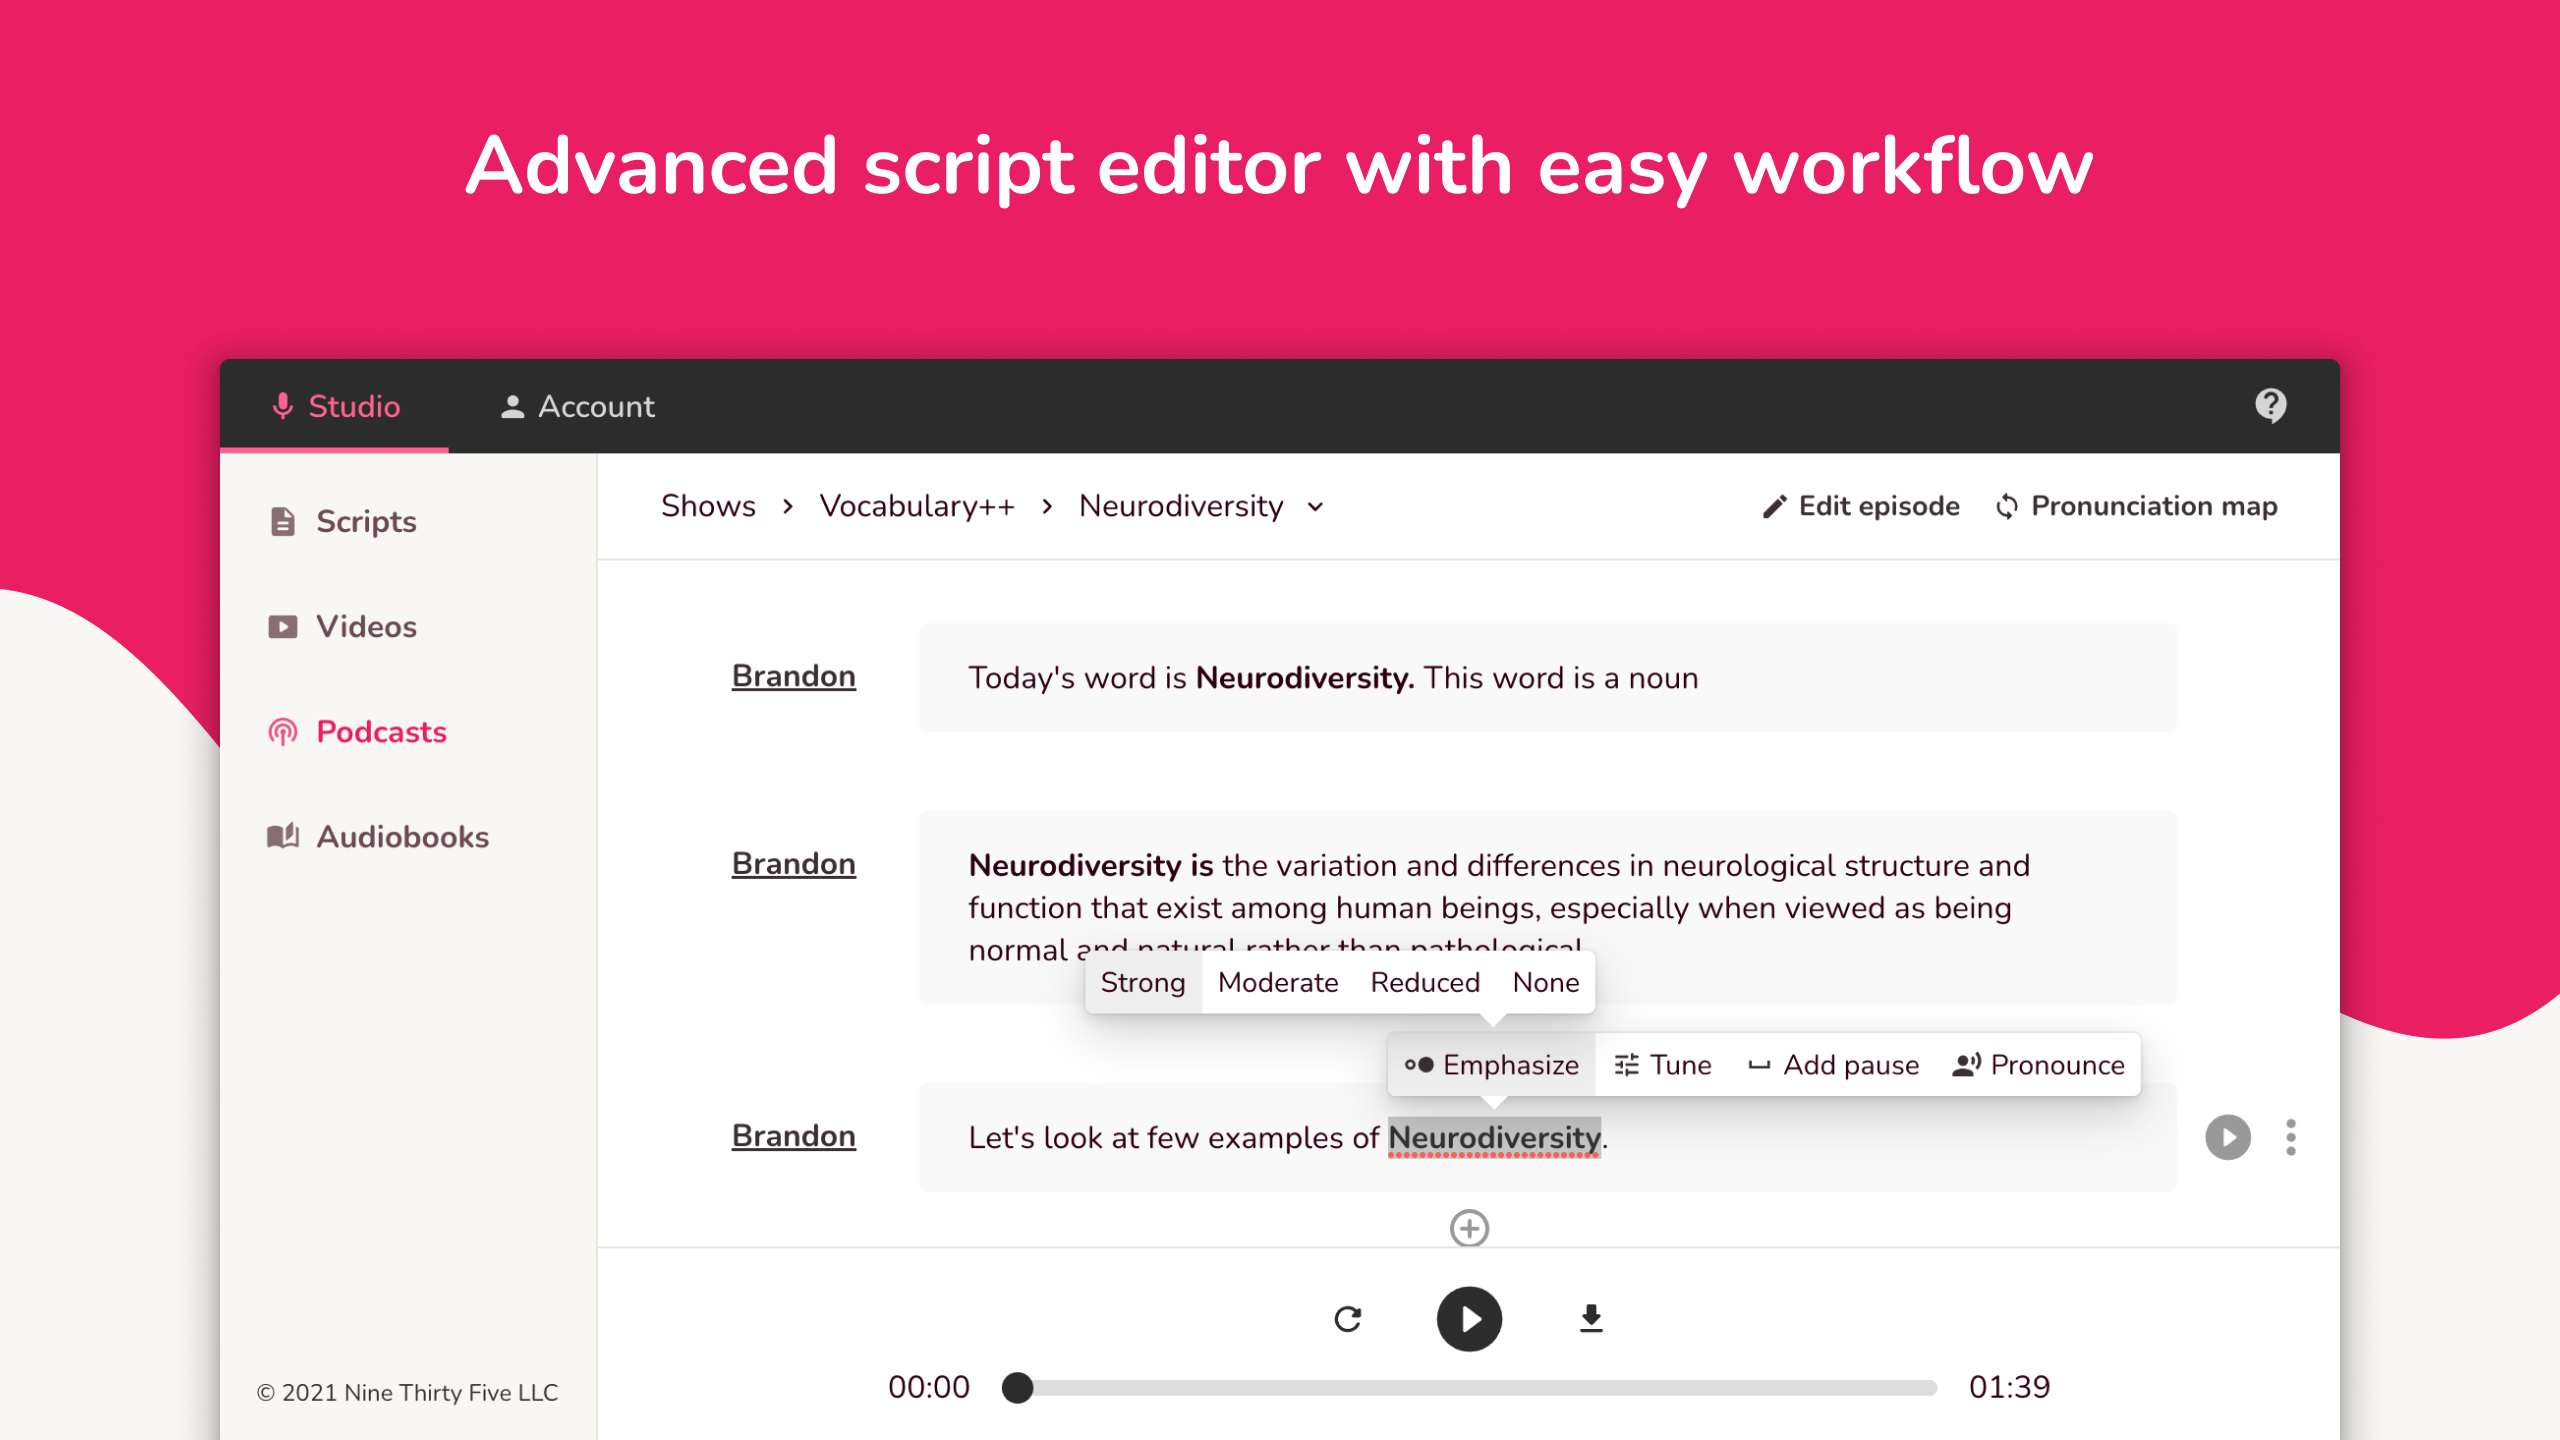
Make use of Fliki’s features to create audio. Source: repository-images
Dive into the world of audio creation with Fliki—it’s as easy as 1-2-3!
1. Script Selection Bliss
Open your Fliki and cherry-pick your content’s pattern! No matter podcasts, audiobooks, videos, or scripts, it’s got your back. It’s best to organize the audio empire with folders.
2. Text It Up
Click the “+” icon to add multiple lines. Fliki spoils you with a smorgasbord of AI voices in 77 languages. You will freely opt for voice styles like joyful or serious— Your content, your rules!
3. Ear Candy Preview
After the audio wizardry, give it a shot to ensure it hits the right notes. Need a tweak? Fret no! Edit the audio to perfection.
4. Download or Share
Download generated audio in MP3 glory or share your audio masterpiece directly on social media platforms using the provided links.
How To Use Fliki For Video Creation
Here comes the step-by-step guide for creating high-quality videos with just a single prompt:
1: Fliki Sign Up
Head over to the exclusive free trial page of Fliki AI by clicking on the provided link. Hit the “Start for free” button to create your account.
Whether it’s your email, Facebook, LinkedIn, or Gmail account, pick your poison. After a successful registration, bask in the glory of the Fliki AI welcome dashboard.
2: Craft Digital Magic
Click on the “NEW FILE” option to set up a new folder. This folder is your trusty sidekick, auto-saving all changes and updates.
Since we’re on the video creation vibe, opt for a Video and name your project.
3: Explore Fliki AI Video Editor
Explore options and features in your video editor dashboard.
Create mind-blowing videos with a few clicks and customize elements by choosing a premium AI version.
4: Create High-quality Videos
- Convert Video From Idea
- Blog Bliss to Video Vibes
- Presentations to Video Powerhouses
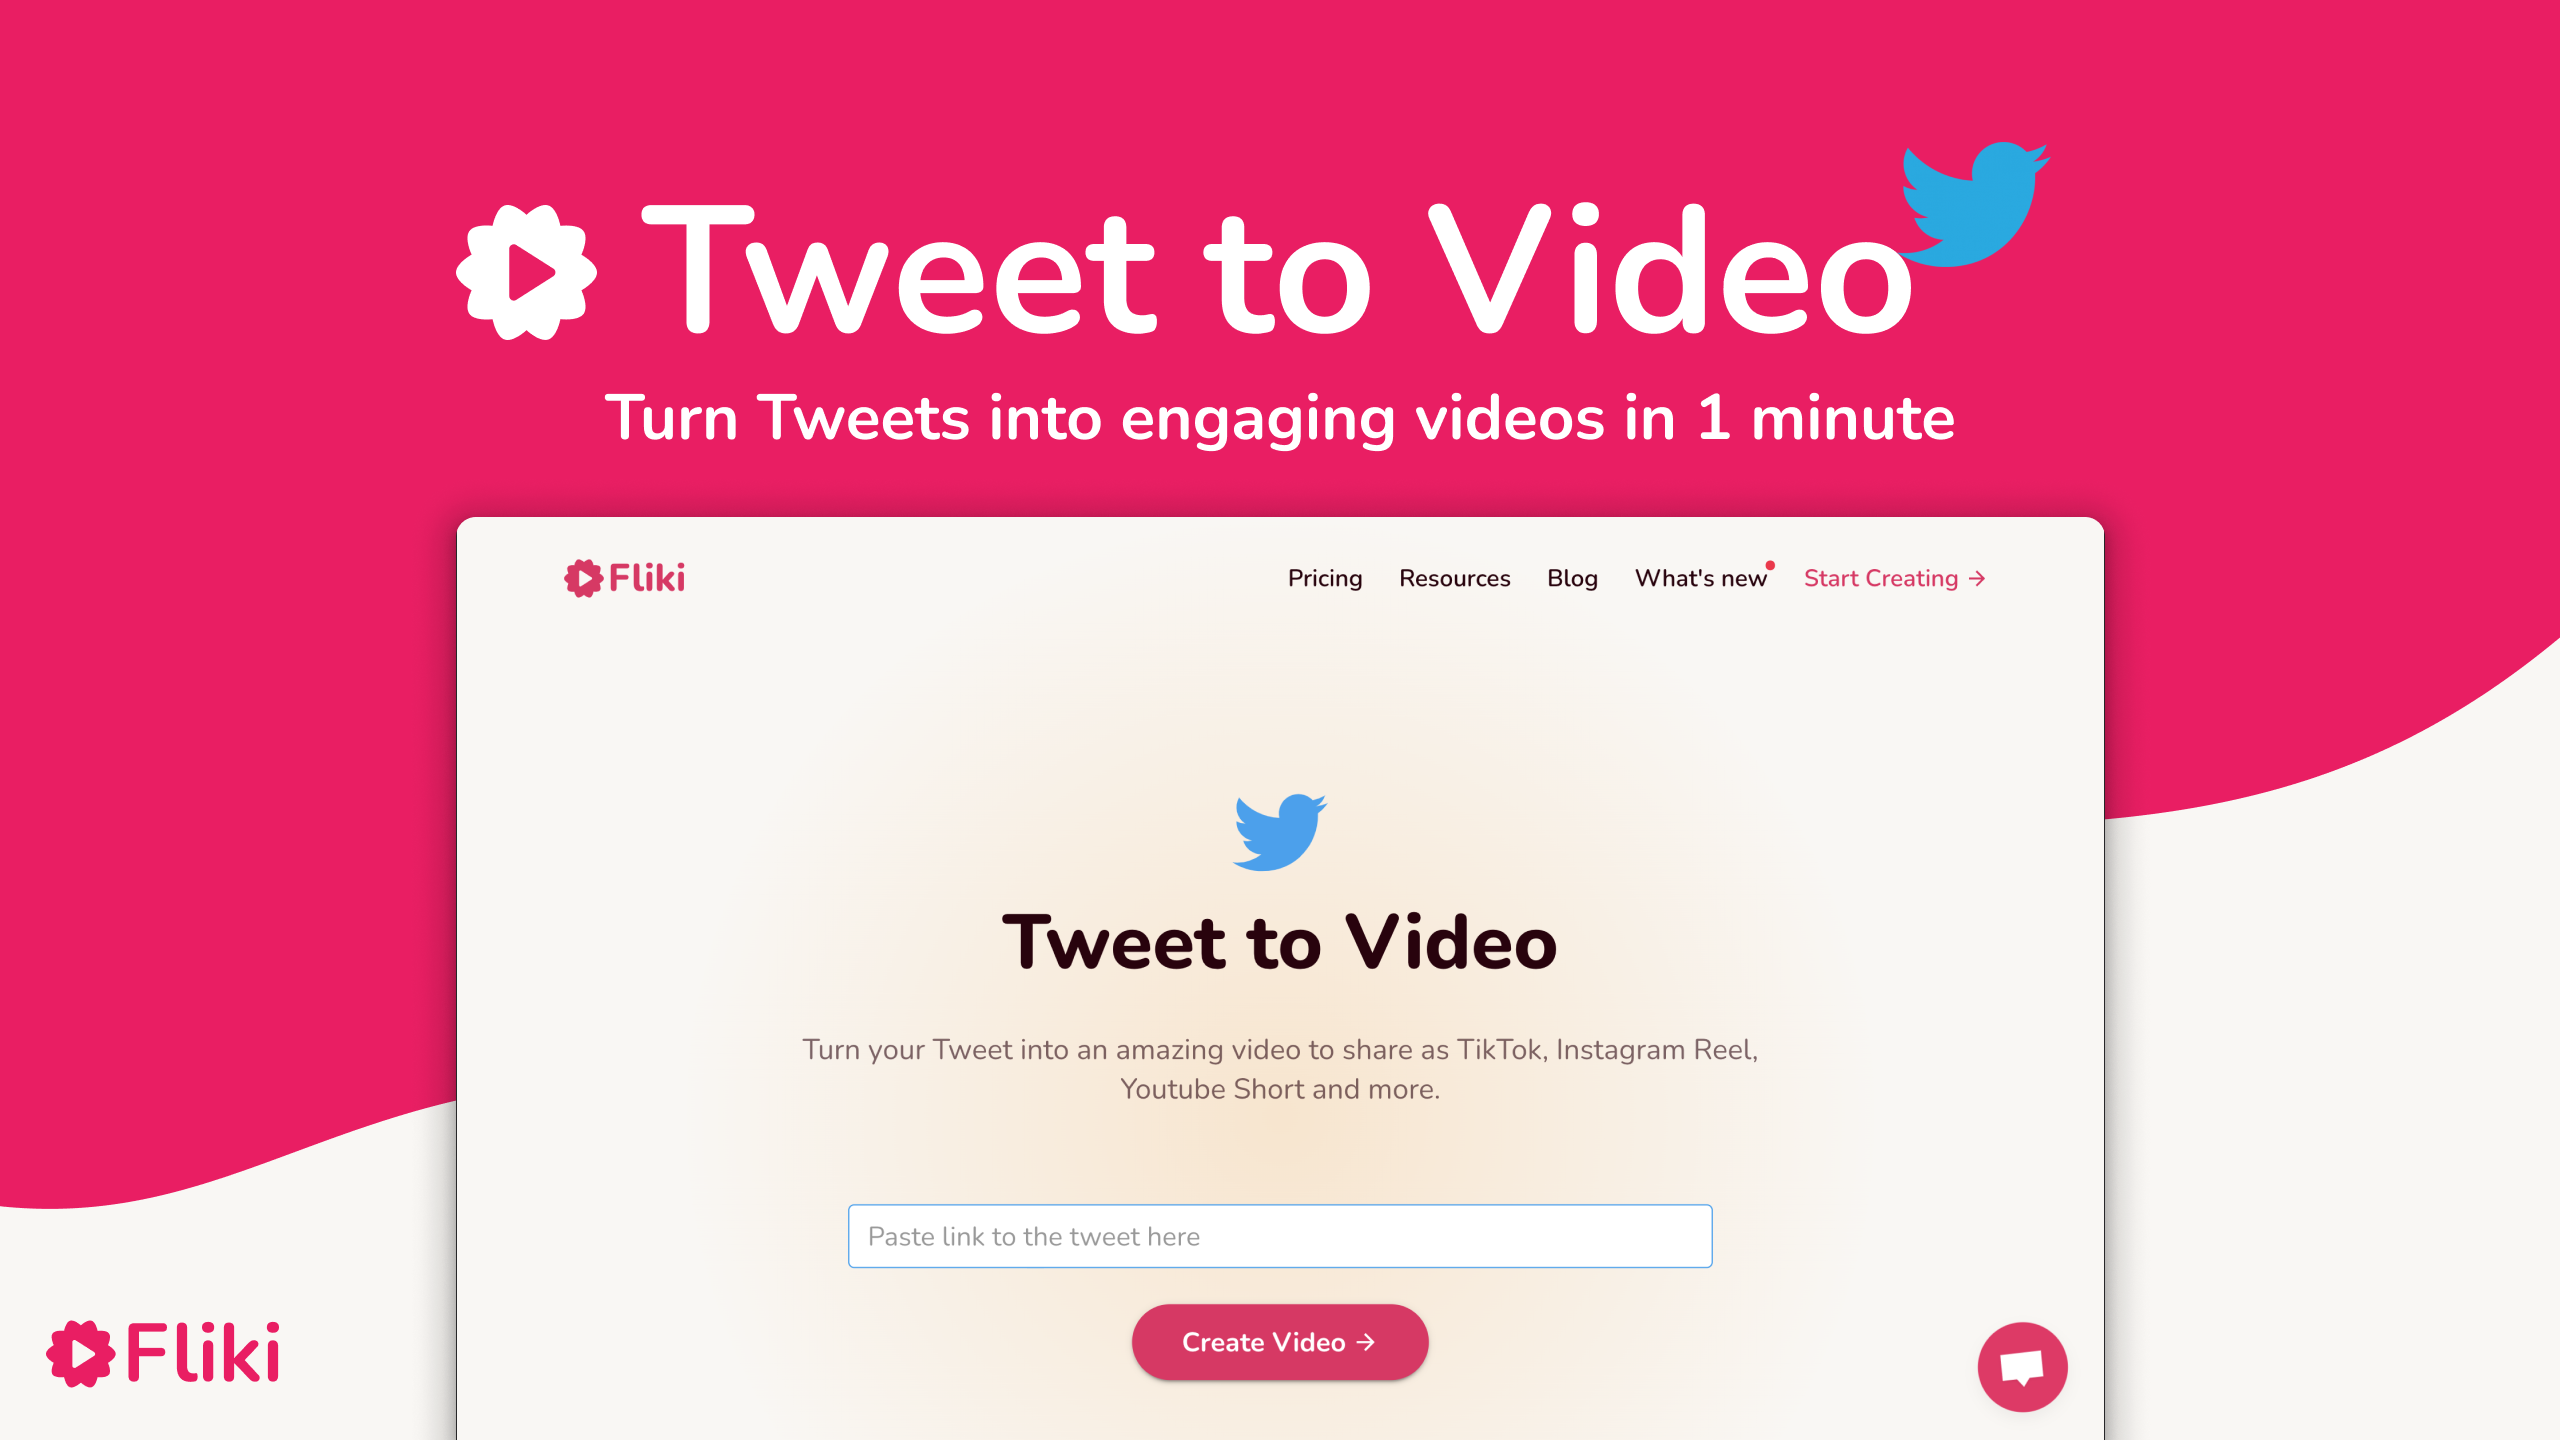
- Tweet To Video Adventures
Convert your tweets into video messages. To this end, just enter the tweet link, click submit, and watch the transformation unfold.
Customize images, text, voice-overs, languages, and scenes, to create a highly engaging interactive video.
Each way is depicted detailedly in the below parts:
5: Download
Once you’ve worked your magic, making all the necessary tweaks and advances to your videos, Click the download box button.
Fliki takes care of business by automatically saving your last edit to the project folder you created earlier.
Whenever updates beckon, access your project folder, make changes, and hit that download Button Again.
How To Use Fliki To Convert Ideas To Video
Generate a concise Fliki idea to video with narration in under a minute.
1: Generate Your Video
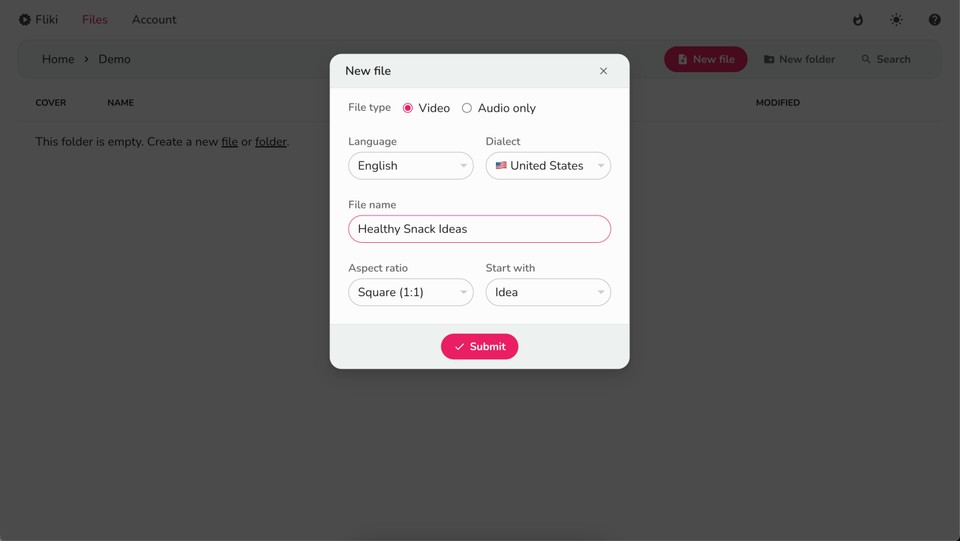
Access the top panel and select “Files.” Click on “New File,” and specify aspect ratio, dialect, language, and dialect. Opt for “Idea” under “Start With” and the click “Submit.”
2: Input The Idea
Input the idea with wanted video length in the idea box available.
Choose between premium stock media or distinctive AI art for each scene. For AI art, pick a style such as cinematic, anime, photographic, digital art, low poly, etc.
Customize further by selecting elements like sound effects, headings, AI avatars, and stickers. Click “Submit” when done.
3: Tailor Voice Narration
Pick the aspect ratio, dialect, and language. Source: googleapis
Fliki will generate the video via your ideas and preferences. If needed, refine the script, voice, avatar, background music, font, placement, and color.
To modify the voice, follow these steps:
- Opt for a scene for your liking and click on the voice name in your voiceover layer to figure out the voice selection popup.
- Filter voices and employ the speaker icon to play any voice sample.
- Scroll and double-click the desired voice. To apply one voice to all scenes, tick the ‘Apply this voice to all voiceovers’ box.
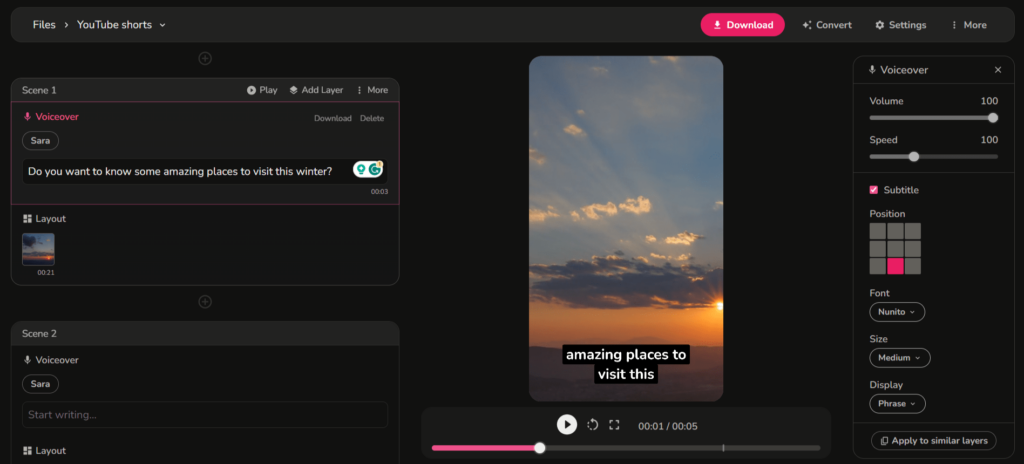
- On your left panel, manage the volume and speed of the voiceover. What’s more, display color, customize visibility, position, font size, animation, and visualization for subtitles.
How To Use Fliki To Create Videos From Tweet
1: Generate Your Video Files
Click the “New File” button to name your file. Afterwards, pick dialect and language, set the aspect ratio, and opt for “Tweet” under “Start With” before hitting “Submit.”
2: Copy Tweet Link
Copy your Tweet link (cross-post) you wish to convert Twitter to videos.
3: Paste Your Tweet Link
Paste the Tweet link and explore additional options like incorporating stock media, AI avatar, AI art, and sound effects to whip up your video. Once done, click “Submit.”
4: Personalize
Fliki will import the video; you have the flexibility to alter the visuals and voice for your Tweet. Preview and pick a voice, then customize elements such as background, avatars, background music, and more.
5: Download
Conclude the process by clicking “Download” and then initiating the export with “Start Export” to obtain your video in MP4 format.
Tweet-to-video creator using AI. Source: i.ytimg
How To Use Fliki AI Avata
Elevate your video content to new heights with AI-powered avatars.
1: Unlock The Premium Version
Sign up for a premium account. This grants you access to a world of creative possibilities, including fantastic AI avatars.
2: Log In
After logging in, open your video file.
Select the scene where you want to inject some AI avatar magic and click on the ‘Avatar’ option in the left panel.
3: Avatar Wonderland
Open the avatar popup by clicking on the Avatar icon. Explore your options:
– Stock Avatar Tab: What a diverse collection of stock avatars! Filter by gender and preview their interactions.
– My Avatar Tab: Upload your image to create a custom avatar.
– Generate Avatar Tab: Craft a personalized avatar using a text prompt. Choose to ‘use this art’ or ‘re-generate’ for a new avatar.
4: Personalize The Creation
Add your personal touch! Customize the avatar’s position, size, background color, transparency, animation, and more using the left panel.
5: Bring It To Life
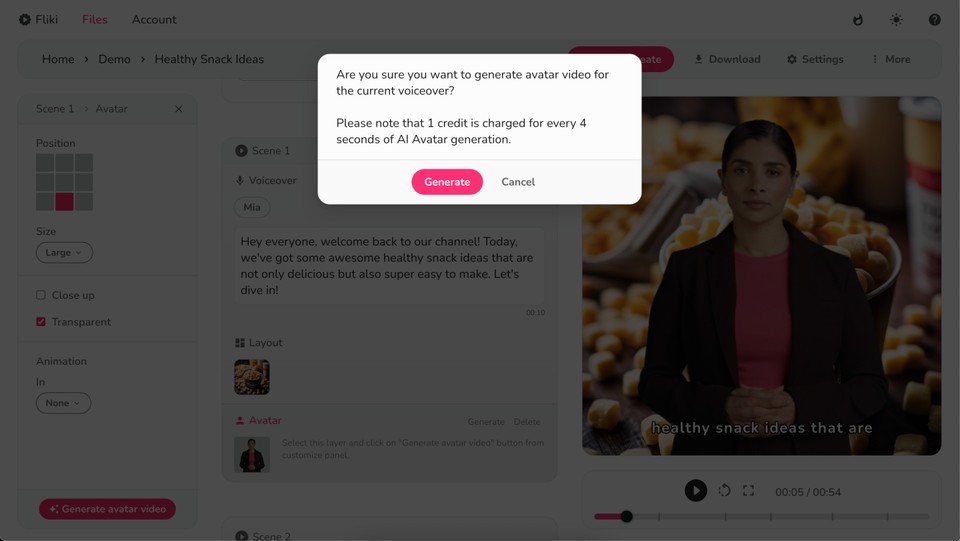
When satisfied, hit ‘Generate Avatar Video.’ Witness Fliki’s magic as it transforms your selections into a dynamic avatar video for the chosen scene.
Be cautious before hitting the button. Source: storage.googleapis
Pro Tips:
- Each second of the AI Avatar video costs 0.25 credits. Finalize your customization before generating to avoid unneeded charges. Frequent script edits may result in extra charges.
- Fliki’s AI Avatar feature is best experienced on browsers like Google Chrome. Certain browsers like Safari and Internet Explorer may not provide full options.
How To Use Fliki To Convert PPT To Videos
Create a tip-top video with a voiceover using your PowerPoint in less than a minute!
1 – Launch The Video Creation Journey
Select the “Files” option from the top panel. Click “New File,” and choose your preferred language, dialect, and aspect ratio.
Opt for “PPT” under “Start With,” then hit “Submit.”
2 – Infuse Your PPT Magic
Click “Choose File” to upload your PowerPoint presentation.
Add an AI Avatar for a virtual talking companion in your video. Hit ‘Submit’ once ready.
3 – Craft The Unique Voice Over
Select the right voiceover. Source: bloggingfix
Fliki works its magic by creating a script and extracting slides from your PPT.
Edit the script, choose your voice, background music, and more. To change the voice:
– Click on any scene.
– Tap the voice name in the voiceover layer and open the voice selection popup.
– Filter voices by language, dialect, and gender.
– Hit the speaker icon for a voice sample, and select your preferred voice.
– Apply the chosen voice to all scenes if desired.
In the left panel, control voiceover volume and speed.
Customize visibility, position, font size, display color, animation, and subtitles visualization.
4 – Unleash Avatar’s Charisma
In the Avatar layer, pick a stock avatar or create a unique one from an image or text prompt.
Adjust avatar settings like position, size, and animation.
Hit “Generate Avatar Video,” confirm, and witness your talking avatar come to life.
5 – Set Background Audio Mood
Enhance your video’s vibe by adding background music.
Click “Choose File” in the background audio layer. Fine-tune music volume and speed in the customization panel.
6 – Download
It’s time to bring your creation to the world! Click “Download,” then “Start Export” to download your video in sparkling MP4 format.
How To Use Fliki AI Art
Embark on a journey of artistic expression by seamlessly integrating AI-generated images into your videos:
1: Unlock The Media Magic
Select your desired scene and open the media selection popup by clicking on the media icon in the layout layer.
Look for the ‘Generate image’ option – the gateway to artistic wonders!
Open media selection popup. Source: storage.googleapis
2: Craft Your Core Prompt
Type in the Core Prompt, encapsulating the essence of the artwork. Be clear about your style, mood, and artists stirring you up.
Provide elements such as core concept, setting, pose, background, medium, preferred artists, website references, resolution, additional details, color scheme, and lighting.
The more specifics you offer, the more enchanting your AI-created art will become.
3: Style Selection Elegance
Choose a style from the list that aligns with your artistic vision. This style will be the brushstroke shaping your AI art appearance.
4: Unleash The AI Artistry
Watch as Fliki transforms your words into a visual masterpiece.
Click ‘regenerate’ for a fresh burst of creativity. Once you find the art speaking to your soul, click ‘Use this art’ to incorporate it into your project.
How To Use Fliki To Convert Blog Post To Video
Follow these steps to embed videos into your blog for enhanced SEO or share them across social channels like Facebook, TikTok, Instagram, and YouTube to drive traffic:
1: Launch Your Video Journey
Select “Files” from the top panel. Click “New File,” and choose language, dialect, and aspect ratio. Opt for “Blog” under “Start With,” hit “Submit” then.
2: Paste URL/Link
Paste your blog article link and select the video length. Choose between premium stock media or unleash the power of unique AI art for each scene.
For AI art, pick a style—cinematic, anime, digital art, low poly, photographic, etc.
Decide on other elements like AI avatars, sound effects, headings, and stickers. When ready, hit “Submit.”
3: Craft Your Voiceover Symphony
Fliki effortlessly generates your video based on blog posts and chosen options.
Edit voice, avatar, script, background music, placement, font, color, and more. To change the voice:
– Click on any scene.
– In your voiceover layer, tap the voice name, opening the voice selection popup.
– Filter voices by gender, dialect, and language.
– Hit your speaker icon for a voice sample.
– Once satisfied, select your preferred voice.
– For uniformity, apply the chosen voice to all scenes if desired.
Control voiceover volume and speed in the left panel. Customize visibility, position, font size, display color, animation, and subtitles visualization.
4: Avatar and Layers Magic
In the Avatar layer, choose a stock avatar or create a personalized one.
Customize avatar settings like position, size, and animation. Click “Generate Avatar Video,” confirm, and watch the talking avatar come to life.
Personalize layers:
– Layout Layer: Choose the premium stock background, upload media, or use AI-generated visuals. Explore layout splits and auto-pick media.
– Picture-in-Picture Layer: Control settings for a smaller video inside the main one.
– Text Layer: Manage on-screen words for emphasis or explanation.
– Audio Layer: Process uploaded audio or add sound effects.
5: Set Your Musical Vibe
Click “Choose File” in the background audio layer to add background music. Fine-tune volume and speed in the customization panel.
6: Unveil Your Creation
Click “Download,” then “Start Export” to download your video in MP4 format.
How To Use Fliki For Making Audiobook
Make Fliki work! Source: catalog-fmapi-prod
1 – Set The Stage
Select “Files” from the top panel. Click on “New File,” choose “Audio only,” and select your language and dialect.
Name your file, keep ‘start with’ as ’empty file,’ and hit submit.
Pro Tip: Organize the audiobook like a book with folders for chapters.
2 – Opt For The Voice
Expand the scene, click the default voice name “Sara,” and select a narrator voice for your audiobook.
Pro Tip: Voices go with icons that support emotions like Angry, Happy, Cheerful, and many more.
3 – Craft The Story
In the voiceover layer, write, paste, or import your audiobook content. Fliki formats it based on new lines.
Pro Tip: Select/highlight text to add pauses, and tweak pitch or speed.
4 – Enclose Music
Enhance the vibe using background music. Click “Choose File” in the background audio layer. Adjust volume and speed in your customization panel.
5 – Download To Save
Preview your creation by hovering over the scene’s top left for individual chapters.
To listen to the whole audiobook, hit play in the bottom audio player. Click ‘Download‘, then ‘Start export‘ to get the audiobook chapter in an mp3 file.
How To Use Fliki For Podcast Make
Get Fliki today! Source: appsumo2-cdn
1 – Set The Podcast Stage
Similar to audiobooks, start by selecting “Files” and creating a new file. Choose “Audio only,” language, and dialect.
Name your file and keep ‘start with’ as ’empty file.’ Hit submit and organize the podcast with folders.
2 – Select The Podcast Voice
Expand the scene, click on the default voice name “Sara,” and pick a narrator voice for your podcast.
Emotional voices will add an extra dimension to your storytelling.
3 – Craft Your Podcast Story:
Write, paste, or import your podcast content in the voiceover layer.
Fliki formats it based on new lines.
Pro Tip: Select/Highlight text to add pauses and adjust pitch or speed.
4 – Set The Podcast Vibe
Add background music for ambiance. Click “Choose File” in the background audio layer and fine-tune the volume and speed in the customization panel.
5 – The Podcast Premiere
Preview individual scenes by hovering over the scene’s top right. For the whole script, hit play in the bottom audio player.
Click ‘Download‘, then ‘Start export‘ to download your podcast in the mp3 files.
6 – Let the Podcast Roam
For hosting and RSS feed, explore platforms like SoundCloud or Riverside.fm.
Distribute your podcast to Spotify, Apple Podcasts, Google Podcasts, and Amazon Podcasts using the RSS link. Your podcast is ready to be on board for the digital stage!
FAQs
Who Is The Founder Of Fliki?
Fliki was founded by Atul Yadav. Yadav founded it in 2021, meaning it is still a relatively new AI video editing platform.
How Easy Is Fliki To Access?
Fliki is very easy to access. This AI tool is available via an online platform. As long as you have an internet connection, you can use Fliki.
Final Words!
In the blink of an eye, transform your ideas into captivating audio and video content in today’s whirlwind of content creation.
Exciting news awaits you—Fliki AI, a game-changer in the stiff realm of content development, is here to redefine your creative process with the whole steps on how to use Fliki.
Wave goodbye to the era of endless quests for the perfect voice actor or drowning in hours of video editing struggles.

